

7.8.5. Analyzing AIDD Results
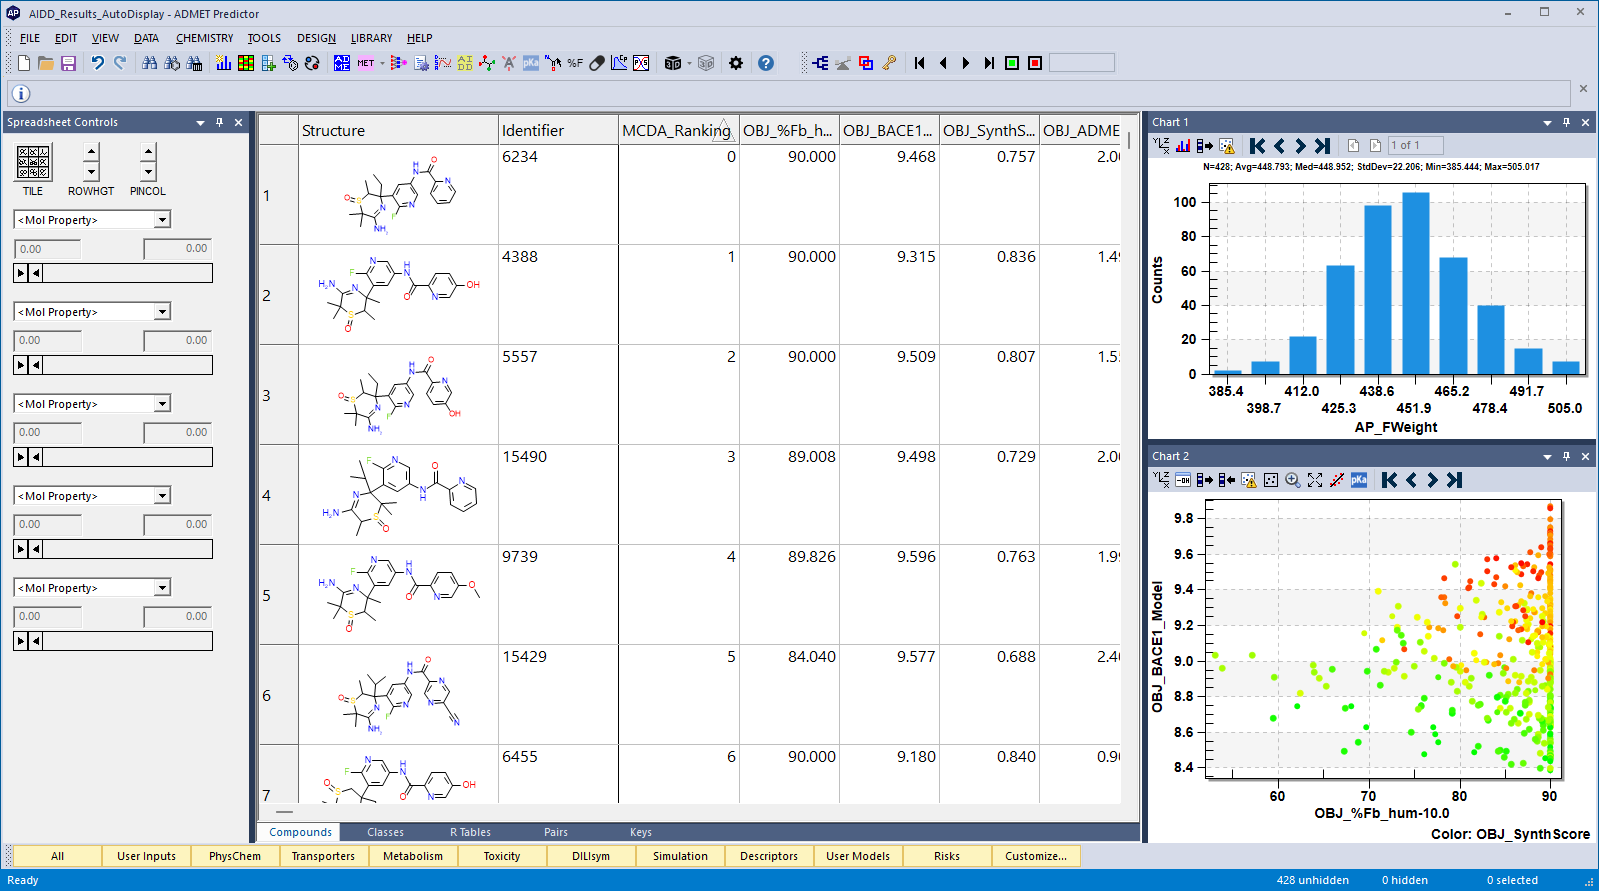
The new instance of ADMET Predictor should open after the run completes and appear as follows. If everything went correctly, the newly-posted product spreadsheet contains 428 compounds. The original seed molecule appears as the first row in the spreadsheet as Seed_(2R,3R)-7c. You can recognize the optimized property attributes by their OBJ_ prefixes (e.g., OBJ_BACE1_Model). Those columns are blank for the first row because the seed molecule did not make it into the final population. All available ADMET and HTPK properties have also been calculated and added to the spreadsheet.
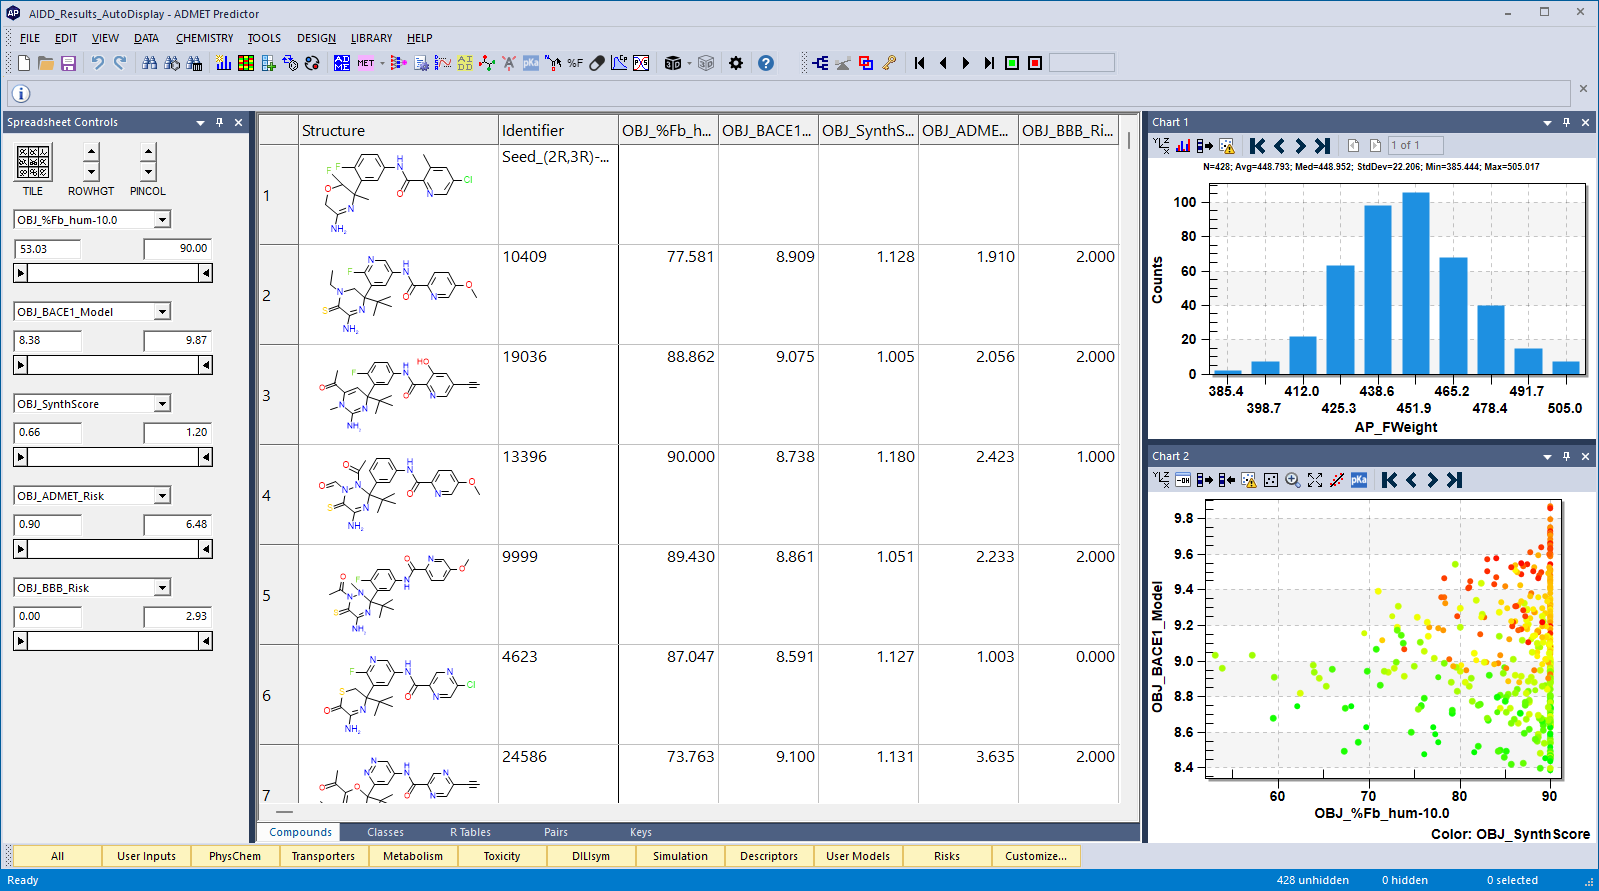
Note that the tabulated values for "regular" predictions will differ from their corresponding OBJ_*** columns (e.g. OBJ_ADMET_Risk vs. ADMET_Risk) if they are out-of-scope. For Risk models, this is because AIDD typically applies a higher Out-of-Scope Risk Factor as multiplier (1 for this tutorial) than the ADMET Predictor's global setting, which is 0.5 by default. Out-of-scope prediction values for other models (e.g., BACE1_Model) will differ because the out-of-scope penalty for standard models specified in the Compound optimization dialog (10 for this tutorial) was added or subtracted, depending on whether the property in question was being minimized or maximized.
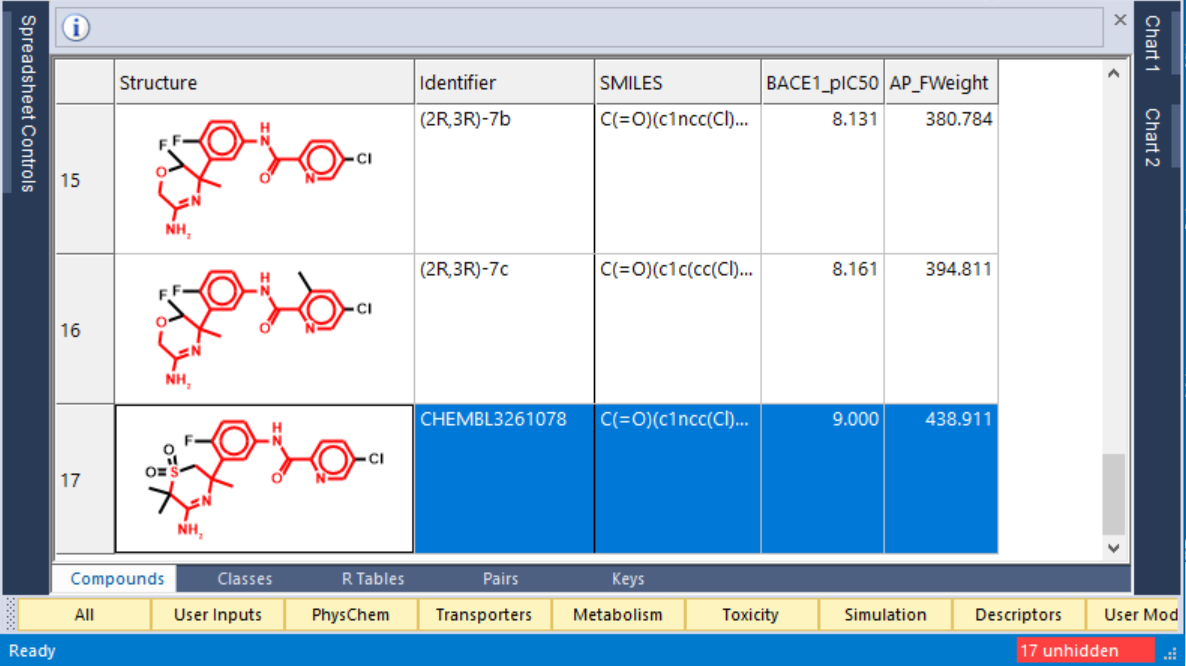
Return to the BACE1-AMIDINE-370 Predictor window from which you launched the AIDD run. The rows should still be sorted in order of increasing potency (BACE1-pIC50) and only the 17 molecules that satisfy the BACE1 scaffold query should be displayed. Scroll to the bottom, where you will see another compound (CHEMBL3261078) that contains a sulfone in the amidine ring. Right-click on this compound and select Copy Structure from the context menu.
Return to the Predictor window that displays the AIDD results. Open the Search using a Query dialog using Edit>>Query By Structure/Property… click on Paste From Clipboard (1).
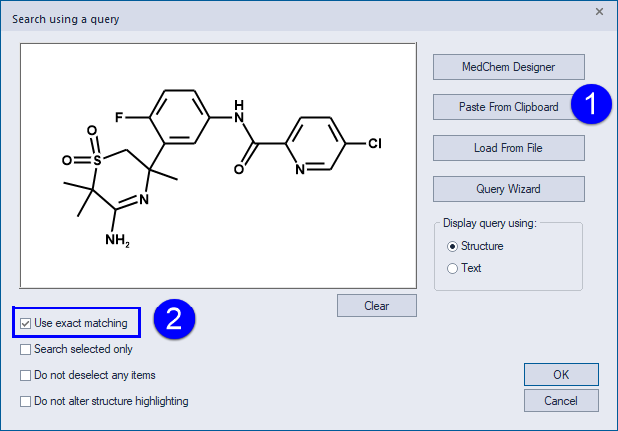
Check the Use exact matching box (2) ON as shown below, and then click OK.
As you can see, the compound is found in the AIDD results as well. Moreover, its predicted pIC50 is close to the observed value (8.9 vs. 9.0), which is not altogether surprising since it was part of the training set used to build the BACE1_Model. Ctrl+T will bring that molecule to the top of the spreadsheet.
Further examination of the 370 molecule training set finds only one other sulfone, and it does not satisfy the constraints imposed by the BACE1 scaffold query. Nevertheless, the algorithm was able to “jump” from a single seed compound containing an oxazine (imino ether) ring to several attractive sulfones - including the one from the training set - as a series of analogs worth exploring.
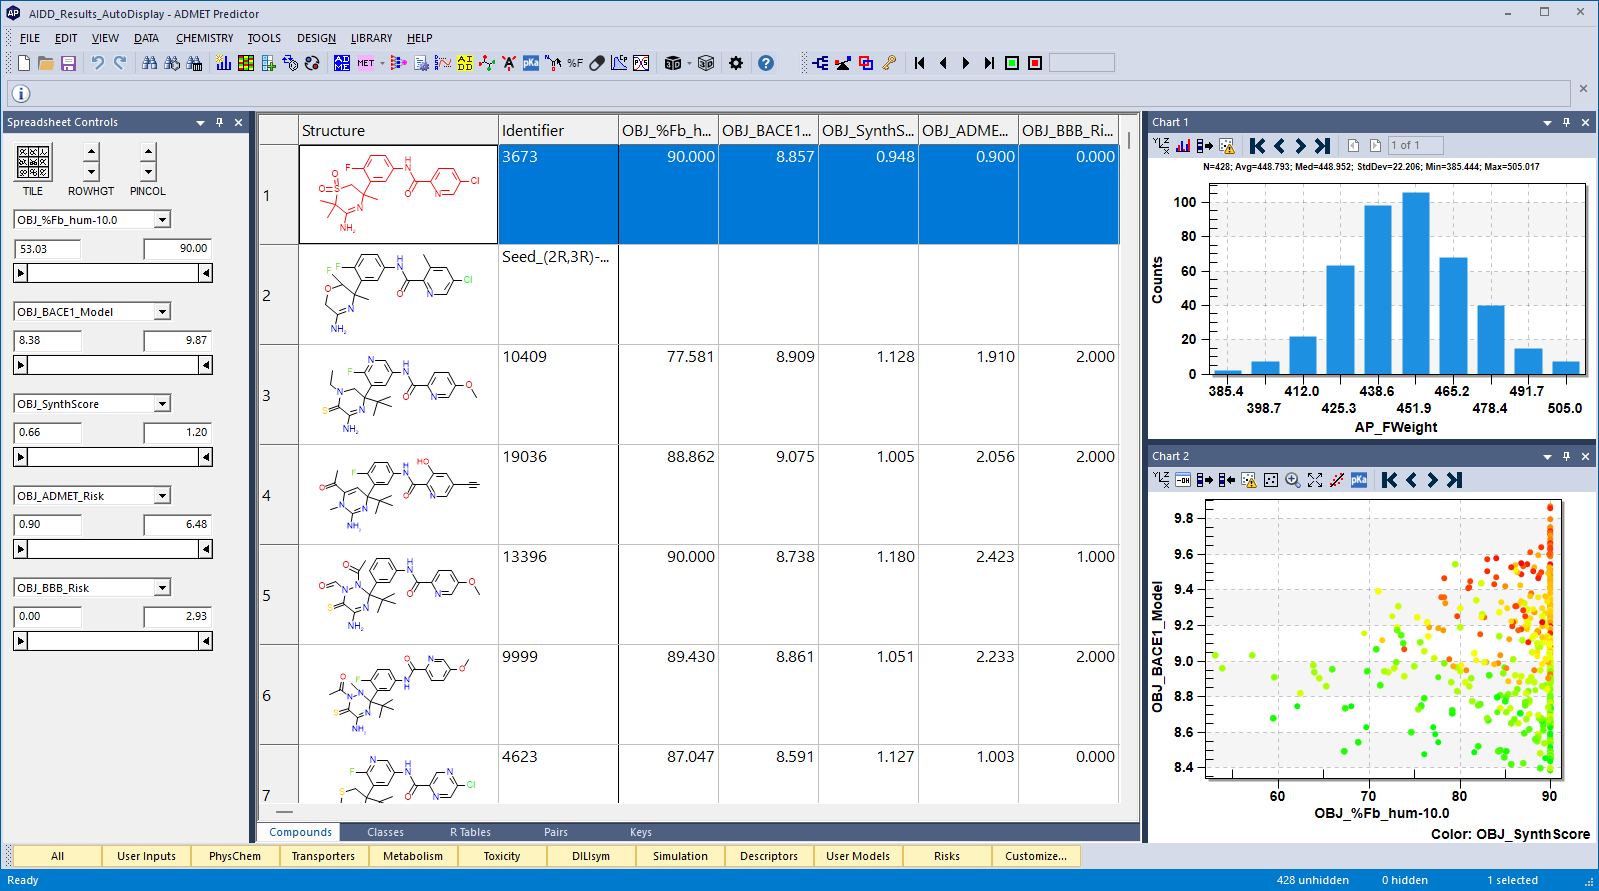
You may wish to prioritize compounds from and AIDD run for synthesis and testing. Two possible ways to do so are 1) using the Spreadsheet Controls with the slider boxes on the left-hand panel, and 2) using the Multi-Criteria Decision Analysis tools that can be found under the “Data Add Compound Attributes” menu.
The Spreadsheet controls will have been pre-populated with the 5 objectives from the AIDD run, along with the full range of values for each objective, but you can change the parameter to any model using the drop-down menus. To limit compounds to those only with %Fb > 80%, simply move the slider to reflect that value or directly enter it in the box above the slider. If you likewise change the values to those shown below, the spreadsheet should show only 112 compounds with 316 “hidden,” which is a more reasonable number of compounds to manually review to help decide which should be pursued.
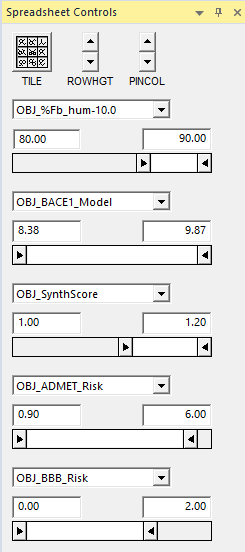
Conversely, MCDA can be used to create a custom compound score. First, go to VIEW >> Hide/Unhide >> Clear Control Panel Filters. This will remove all limits from the Spreadsheet Controls and all 428 compounds will again be unhidden. Then go to “Data Add Compound Attributes” and, if asked, select “All spreadsheet rows.” This will bring up the following window, where you will select “MCDA ranking” and click OK.
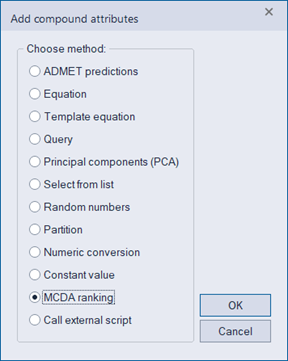
This will bring up a window where you can choose specific objective criteria along with customizable weights and a choice of MCDA algorithm. For more information see the section on MCDA. For this example, let’s keep four of the original five AIDD objectives, but replace the ADMET Risk score with the S+Sw solubility model; this might be the case in early drug discovery when you’re more concerned with solubility than overall ADMET risk.
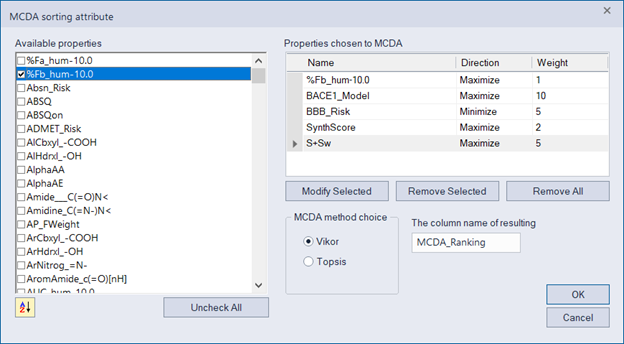
Add the desired properties by clicking on the check box in the “Available properties” window on the left, which will make them appear in the “Properties chosen to MCDA” window on the right. Double-clicking on a property on the right will bring up a window that will allow you to change the direction (minimize or maximize) and the weight.
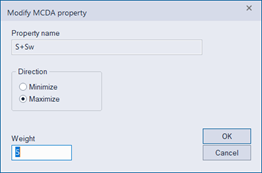
Adjust the settings to match those above and click OK to proceed. A new column called “MCDA_Ranking” will appear on the spreadsheet. Click at the top to sort from low to high values; the compound with the lowest value of “0” is the most optimal across your chosen parameters and weights.
This concludes the tutorial. You may wish to analyze the results further or try running with somewhat different parameters to see how much doing so affects your results. Once you are finished, you may want to return to Model Editor and turn off or delete the BACE1_Model and BBB_Risk user models that you loaded for this tutorial.