

3.3. Modeler Menus
ADMET Modeler's menu bar includes four options: File, Edit, View and Tools.
The File Menu is used to Open an existing project to review the results of that run or to repeat it; to retrieve descriptors and architecture from a saved model; to retrieve the parameters from a previous run for reuse; to Save the current project or to Exit ADMET Modeler.
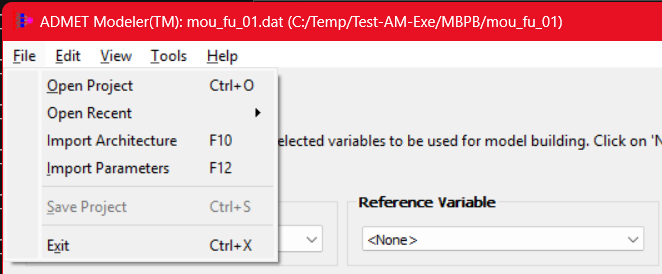
File >> Open Project (Ctrl+O) opens a project that you saved previously. When a project is opened, the associated data are loaded into memory and the Model Performance Grid is populated with its results. You can then navigate through the various set-up pages to modify parameters and settings (e.g., provide a new random number seed) or initiate a fresh Build from the Summary Page. To save some time, you may want to reuse the Kohonen map generated in the previous run via the Test Set Selection dialog.
Be aware that if the reopened project used a Kohonen map for Test Set Selection, the current parameter settings for Test Set Selection will be set to Reuse an existing Kohonen map to save time by not regenerating it. This does mean, however, that changing the Random seed will not change the training pool /test set partition.
This is useful for resuming or extending your work on a saved modeling project. It can also be used to recover some of your work when the machine gets interrupted before completing an analysis. Even if the project has not been saved, you can access your last completed modeling session or an interrupted one by locating the appropriate .prm file in the Temp folder in your ADMET Modeler applications directory.
File >> Import Architecture (F10) lets you retrieve the descriptors from a specific model file (e.g., .net, .svm, .kpl, or .pls) that was saved previously and use them to set the contents of the Descriptors selected for training list on the Variable selection page. This is convenient if you have changed the training set slightly and simply want to retrain the model while keeping the same architecture. The model type selected on the Modeling Protocol page gets changed by the Import Architecture command, as does the architecture specification on that model type's settings page. The latter will be set to restrict the architecture to that of the model you selected. For an ANNE model with 3 neurons and 35 inputs, for example, the neuron Minimum, Maximum and Step will be set to 3, 3 and 1, respectively. Similarly, the network input Minimum, Maximum and Step will be set to 35, 35 and 1, respectively.
Note that no other parameters or data are modified by File >> Import Architecture. If you want all parameters corresponding to a model set appropriately, use File >> Import Parameters first to load them, then use File >> Import Architecture to restrict the Descriptors selected for training and set up model building for a single architecture.
File >> Import Parameters (F12) reloads an input parameter file, which is useful for examining the settings that were used to perform a previous run, to repeat it or to run some variation - e.g., using a different random seed or range of model settings.
File >> Save Project (Ctrl+S) copies the contents of ADMET Modeler's working directory in the Temp folder in its applications directory to a permanent location you specify. The menu item is disabled until a model has been built during the current Modeler session and while model building is in progress.
File >> Exit (Ctrl+X) exits the program. If you built a model and did not save your project, you may be asked to confirm that you want to close the program anyway and risk losing your model-building work.
The Edit Menu allows you to copy the contents of the grid as an image or as text.

Edit >> Copy Ensemble Grid as Image copies the grid as clipboard art that can be pasted into applications like Paint or Microsoft Word.
Edit >> Copy Ensemble Grid as Text, in contrast, populates the clipboard with textual data from the grid which can be pasted as a table into Microsoft Excel.
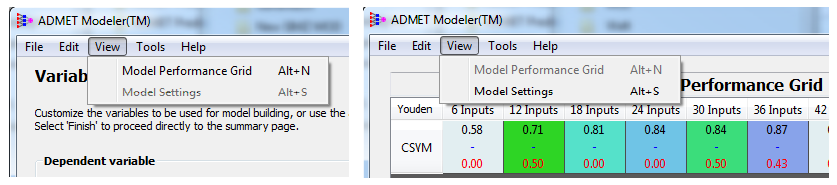
The View Menu is used to navigate from one of the Model Settings pages to the Model Performance Grid (Alt+N) or from the Model Performance Grid to the Model Settings Summary page (Alt+S).
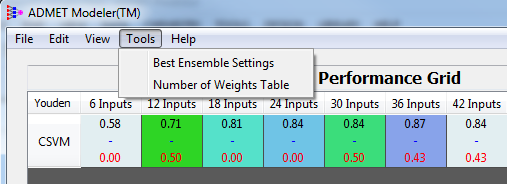
The Tools Menu provides access to the Model Selection Criteria dialog and to the Number of Weights Table.
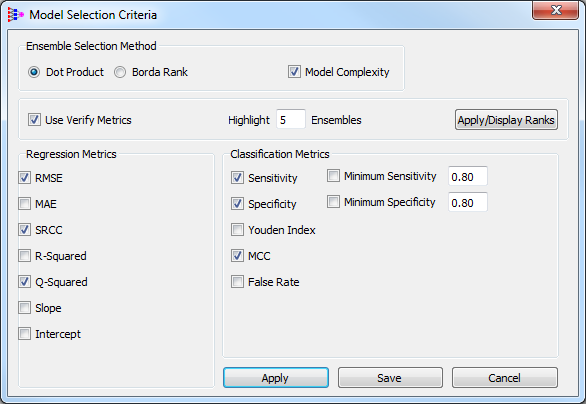
Tools >> Best Ensemble Settings will display the Model Selection Criteria dialog, where you can adjust the criteria used to rank the models in the grid. It controls which performance criteria are included, whether verify metrics are included, and whether those criteria are combined as the Dot Product or via Borda Rank. Further details are provided in the Theory chapter (3.4.6).
The dialog also allows you to Display the ranks for all models in a separate window.
The Number of Weights Table is specific to neural network modeling. It shows the number of weights that are used to describe each ANN architecture that you choose to explore. The number of weights for each architecture is calculated from the number of network neurons and the number of inputs; the number of classes also contributes for multi-class ANNE models. Which architectures are represented in the array shown is determined by the options selected on the ANN settings page or by the grid currently displayed in the Model Performance Grid, depending on where the table window is launched from.
The figure below shows the weights table for a typical combination of network neurons and descriptors. The number of weights should always be less that than the number of data points in the data file, as described in the ANNE Settings discussion.
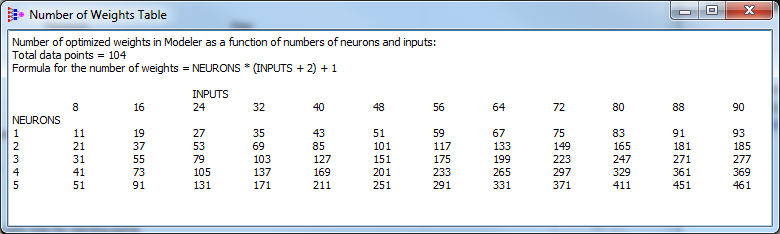
The weights table can be viewed, but it cannot be edited.