

KNIME
Incorporating ADMET Predictor into a KNIME Workflow
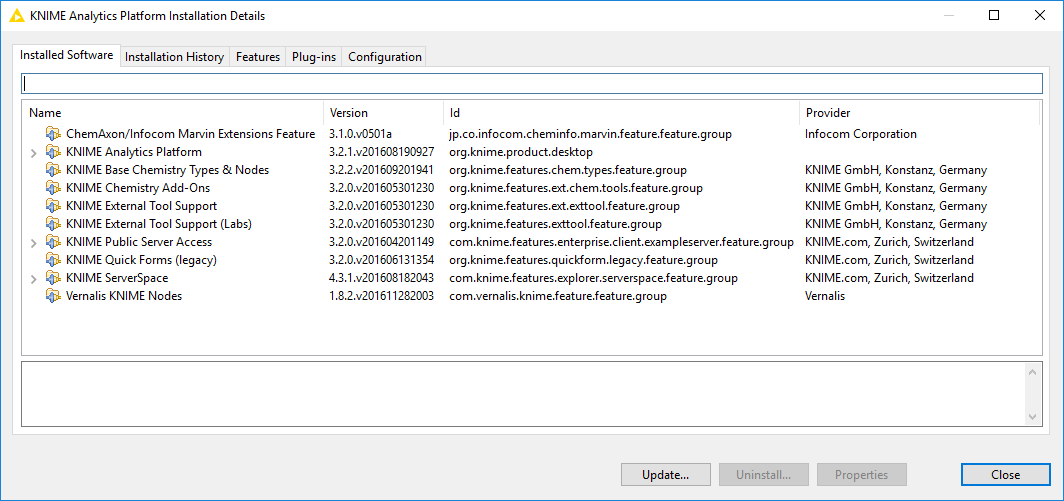
In order to use the ADMET Predictor workflow for KNIME, first ensure that ADMET Predictor has been installed, licensed, and can be executed from the command line. The ADMET Predictor KNIME meta-node requires KNIME 4.2 or newer versions. The following software also needs to be installed in KNIME, otherwise the workflow will not function. The dialog box below can be display via “File Install KNIME Extensions…” and clicking on “What is already installed?”.
NOTE:
The packages names (above) are valid for KNIME 3.2. If you do not find the exact same package, try using the key words from the package name, e.g. KNIME Quick Forms in KNIME 3.2 was called KNIME Nodes to create KNIME Quick Forms in earlier versions of KNIME.
Importing the ADMET_Predictor Workflow into KNIME
-
Open KNIME.
-
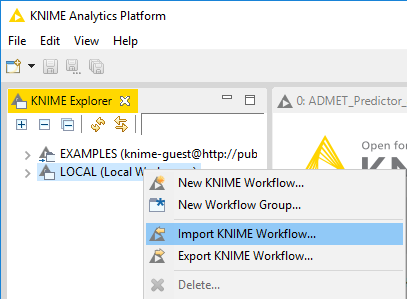
Right click on LOCAL (Local Workspace) and select Import KNIME Workflow…
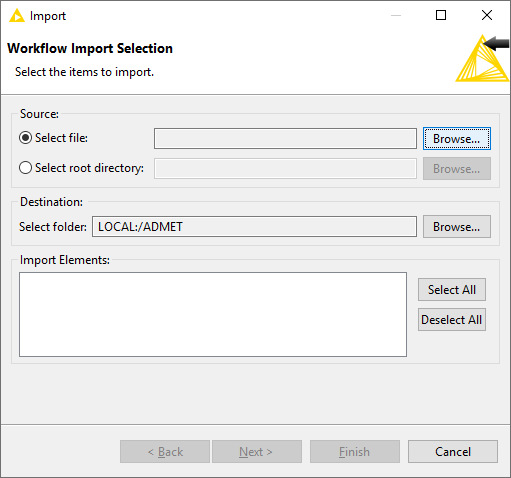
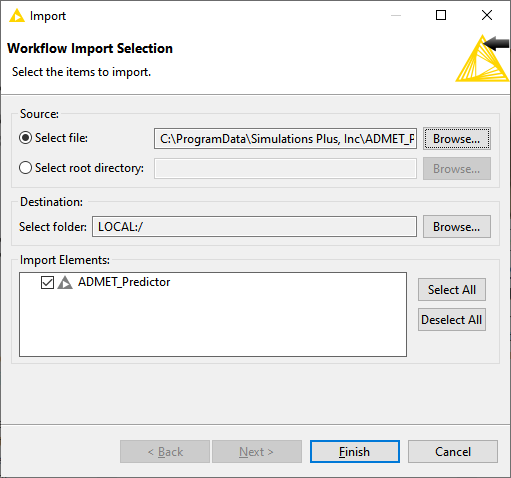
Click “Select file”, then “Browse…” and navigate to “C:\ProgramData\Simulations Plus, Inc\ADMET Predictor11.0\”
select the workflow called “ADMET_Predictor.knwf”, click “Open”,
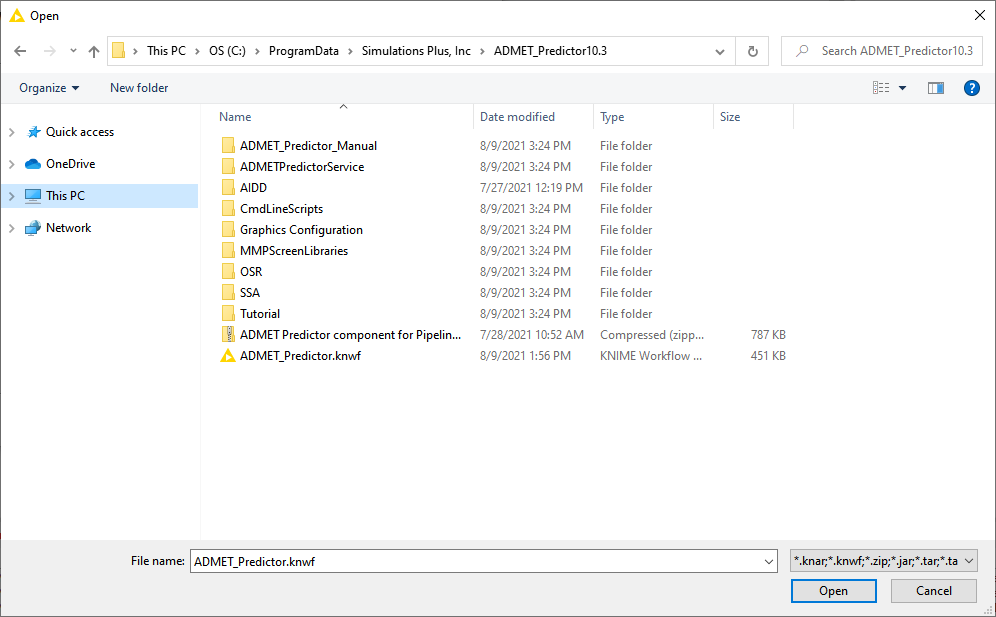
and then click Finish.
-
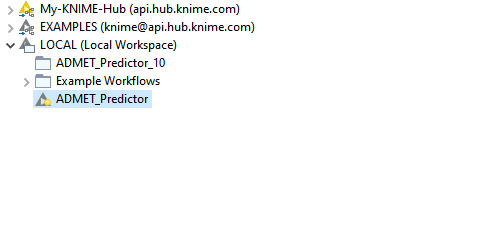
ADMET_Predictor should now appear in KNIME Explorer window.
-
Double Click ADMET_Predictor to open the workflow in the KNIME Workspace
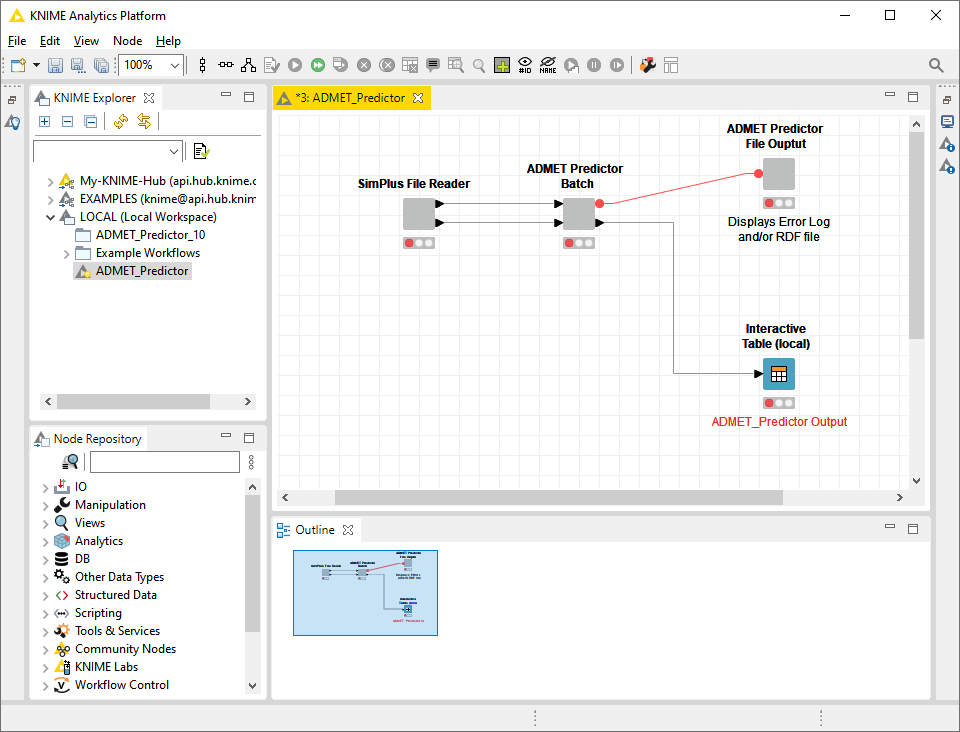
Using the ADMET_Predictor Metanodes in KNIME
-
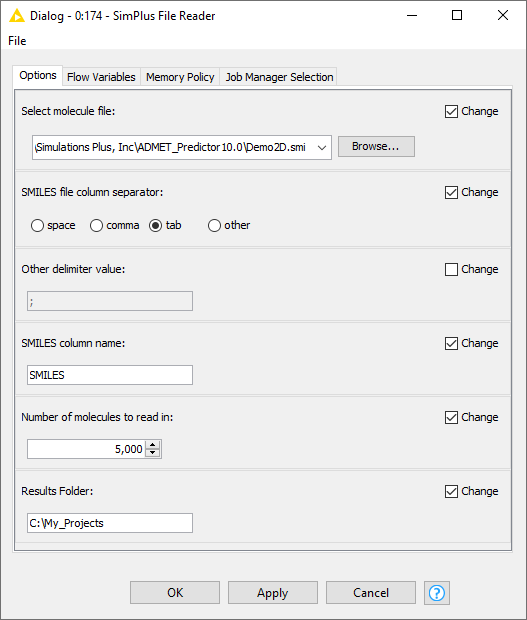
Configure the “SimPlus File Reader” metanode by selecting the node and pressing F6, double clicking the node or right clicking and selecting “Configure…”.
-
Browse to Demo2D.smi located in the ADMET Predictor installation directory (C:\ProgramData\Simulations Plus, Inc\ADMET_Predictor13.0).
-
This file contains columns with headers. Ensure that the “SMILES file column separator:” check box is selected and the “tab” radio button is chosen.
-
Check the “SMILES column name” and ensure that this reads “SMILES”.
-
Select the “Results Folder:” as to a directory where you want to save your results. Click the “OK” button to dismiss the dialog box. Subdirectories will be created in the “Results Folder” and will contain results from each run.
The “SimPlus File Reader” allows users to import SDF files, extended SMILES files and entire directories of MOL files. This metanode is provided as an example to demonstrate the input stream required by the “ADMET Predictor Batch” metanode.
Extended SMILES files are tab-delimited and may contain multiple SMILES strings as well as other information. The first row must contain header information with SMILES as the header for the first column. The first few lines of Demo2D.smi opened in Excel is displayed below.

-
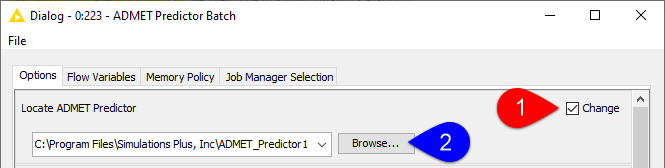
Configure the “ADMET Predictor Batch” metanode by double clicking on it. Click the “Browse…” button in the “Locate ADMET Predictor” section. The “Browse...” button is deactivated by default. However toggling on the “Change” check-box (1) will activate this button. Browse to and select “ADMET_Predictor.exe” in the installation directory (C:\Program Files\Simulations Plus, Inc\ADMET_Predictor13.0).
If you are running the KNIME workflow and ADMET Predictor on linux operating system, please update the path using Browse button and select RunAP.sh file from your ADMET Predictor installation folder.
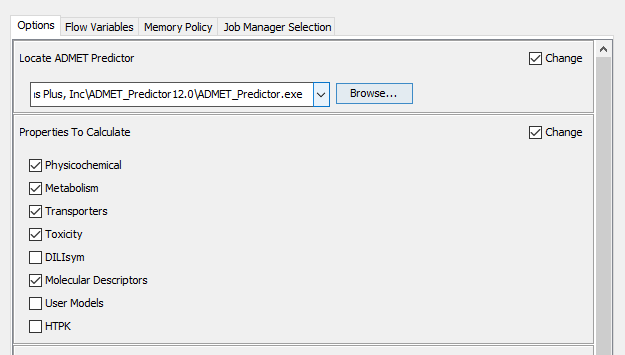
ADMET Predictor Batch: allows users to configure the ADMET Predictor run to their specific needs and joins the ADMET Predictor outputs into a single data stream. This metanode is intended for use in more comprehensive KNIME workflows. In order to execute this metanode, the user must configure the location of their installed ADMET Predictor executable. All other configurations are optional.
Certain configurations will change the output of the ADMET Predictor metanode. There are a number of possible modules to select which will calculate a variety of properties. By default, a number are selected.
Click “OK” to dismiss the dialog box ADMET Predictor Batch.
-
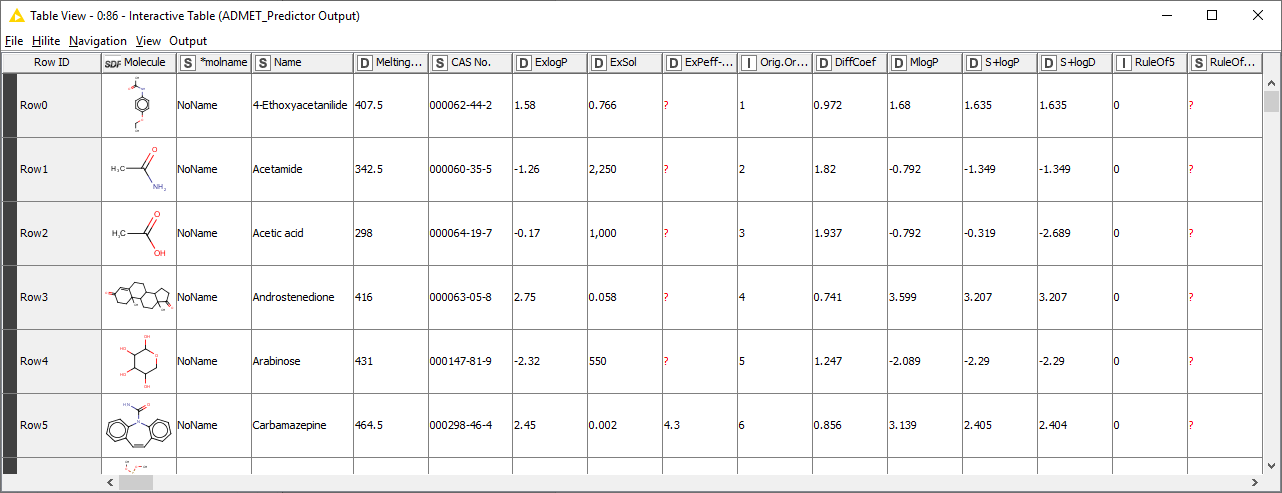
Right click the Interactive Table node and select Execute and Open Views.
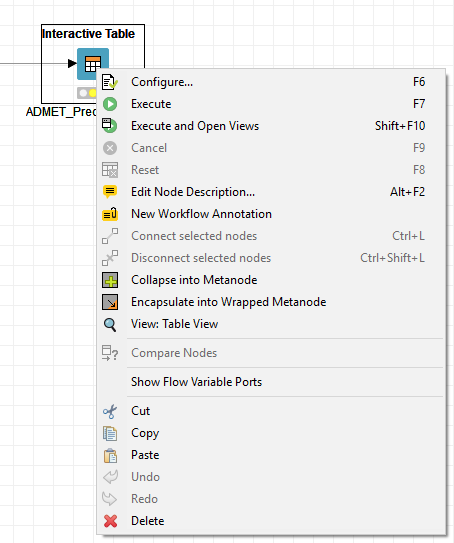
If Execute and Open Views does not display the table with results, right click theKNIME Interactive Tablenode and select View: Table View or reset the ADMET Predictor Batch metanode and repeat this step.
-
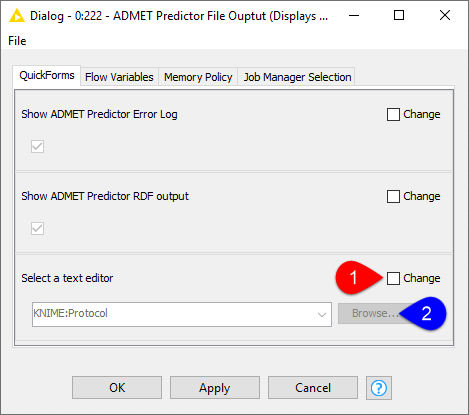
Right click on the ADMET Predictor File Output metanode and click Configure.
The “Select a text editor” field has KNIME:Protocol as a default text editor. However the user MUST change this field to any text editor of their interest.
On windows operating system, “C:\Windows\System32\notepad.exe” can be used. Else user can use any other text editor of their choice.
Similarly, for Linux operating system, one can use any text editor like gedit, vi or kwrite. Please provide the path to the text editor of their choice e.g. /usr/bin/gedit.
Click OK
The ADMET Predictor Output metanode can be configured to display the ADMET_Predictor_Errors.log or RDF output in the users preferred text editor.
-
Right click on the ADMET Predictor File Output metanode and click Execute.
ADMET_Predictor_Errors.log will open in one of the text editors mentioned in step 4.
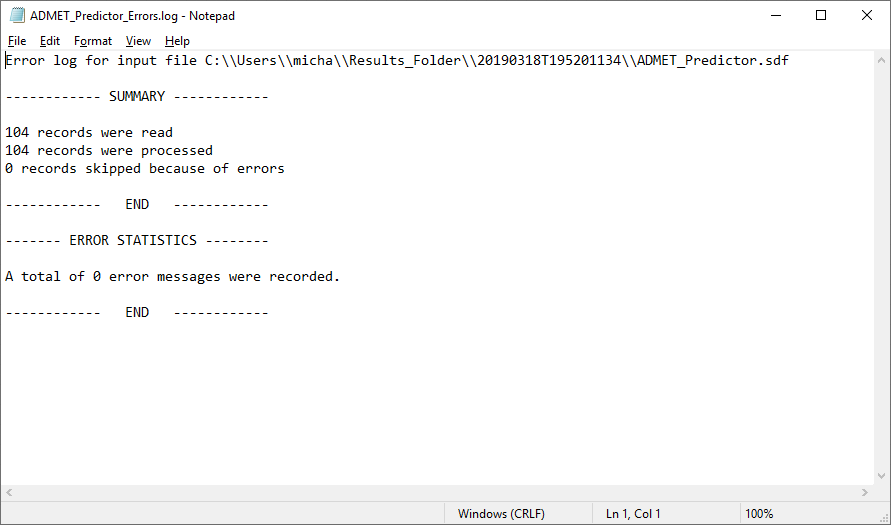
An RDF file will open only when the ‘Save microstates in RDF format’ is selected in the ADMET Predictor Batch metanode and Show ADMET Predictor RDF output is selected in the ADMET Predictor File Output metanode.